How to Create and Run Workflow
Select Tools –> Workflow Designer or File -> New workflow from the main menu.
Result: The Workflow Designer window appears.
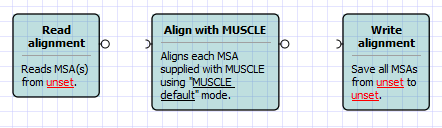
On the Elements tab of the Palette, find the Read alignment element. It is located in the Data sources group. Drag it to the Scene.
Result: The element is displayed on the Scene.

Repeat the previous step for the Write Alignment element from the Data sinks group and the Align with MUSCLE element from the Multiple sequence alignment group.
Result: All three elements are on the Scene.
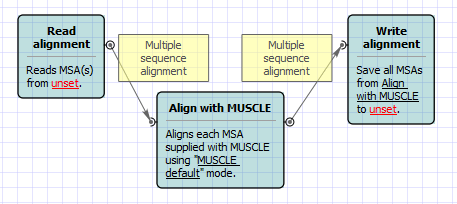
Connect the elements:
- Drag an arrow from the output port of the Read alignment element to the Align with MUSCLE element.
- Drag an arrow from the output port of the Align with MUSCLE element to the Write alignment element.
Result: The elements are connected by arrows.
Select the Read alignment element. In the Parameters area of the Property Editor, click on the Value column of the Input files parameter:
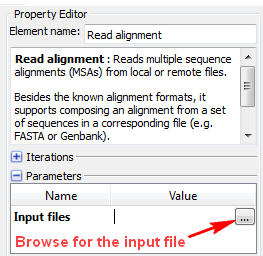
Browse for an input file, for example, select the $UGENE\data\samples\CLUSTALW\COI.aln file.
Result: The Input files value is set to the file’s path.
Select the Write alignment element and set the Output file, for example, you can just enter result.aln.
Result: All required workflow parameters are set.
Click the Run workflow button on the toolbar.
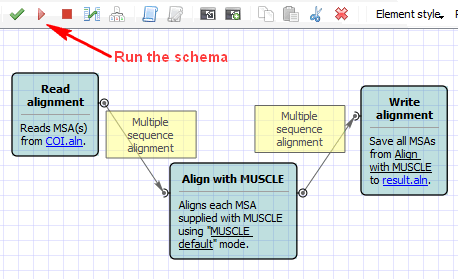
Result: After the workflow has run, a blue notification pops up.
Open the result.aln file in UGENE.
Result: The file is opened and contains the result of the alignment with MUSCLE.