How to Open and Save Intermediate Breakpoint Results
During debugging, it is sometimes necessary to view intermediate results after each step.
For this purpose, the table “Messages from
Let’s look at this with a workflow example: “Samples” -> “Alignment” -> “Align sequences with MUSCLE”.
- Select the “Read Alignment” worker and add input files “COI.aln” and “HIV-1.aln” from data/samples/CLUSTALW.
- Set a breakpoint on the “Align with MUSCLE” element from the context menu or use the Ctrl+B shortcut. The “Align with MUSCLE” element will have a red frame.
- Press Ctrl+R (Run workflow). The breakpoint will be triggered.
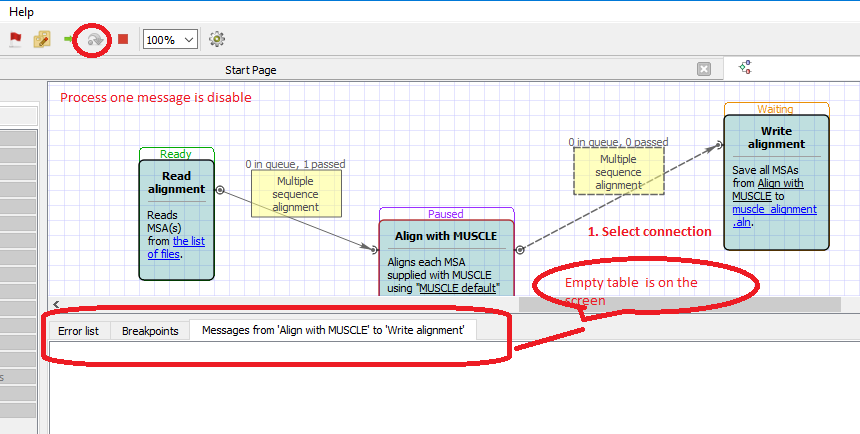
- First, click on the connection between the “Align with MUSCLE” and “Write alignment” elements. An empty table “Messages from ‘Align with MUSCLE’ to ‘Write alignment’” appears. Note that the “Process one message” button on the main toolbar is disabled.
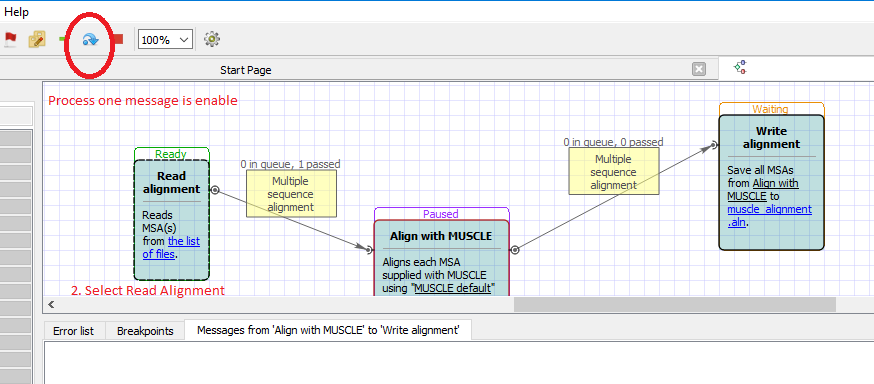
Select the “Read alignment” element on the Scene. After that action, the “Process one message” button on the main toolbar becomes enabled.
Click “Process one message”. A new row appears in the intermediate table.
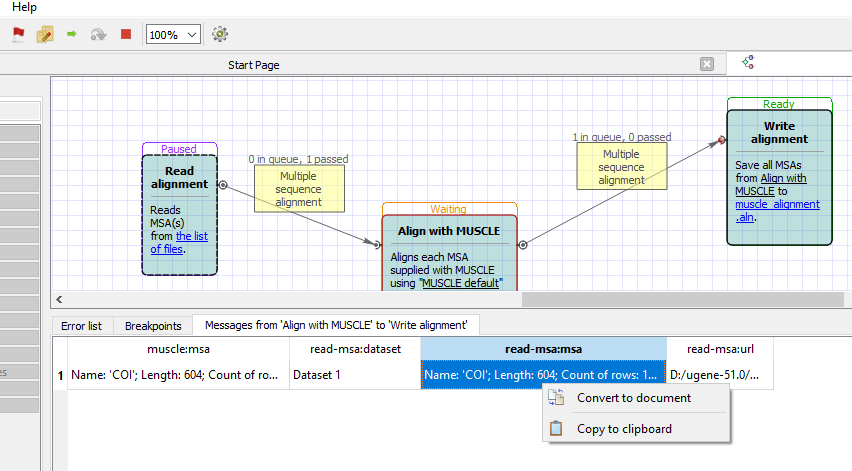
The value from this table can be converted to a document or copied to the clipboard from the context menu.