
UGENE Tips: Public Databases
UGENE Public Database
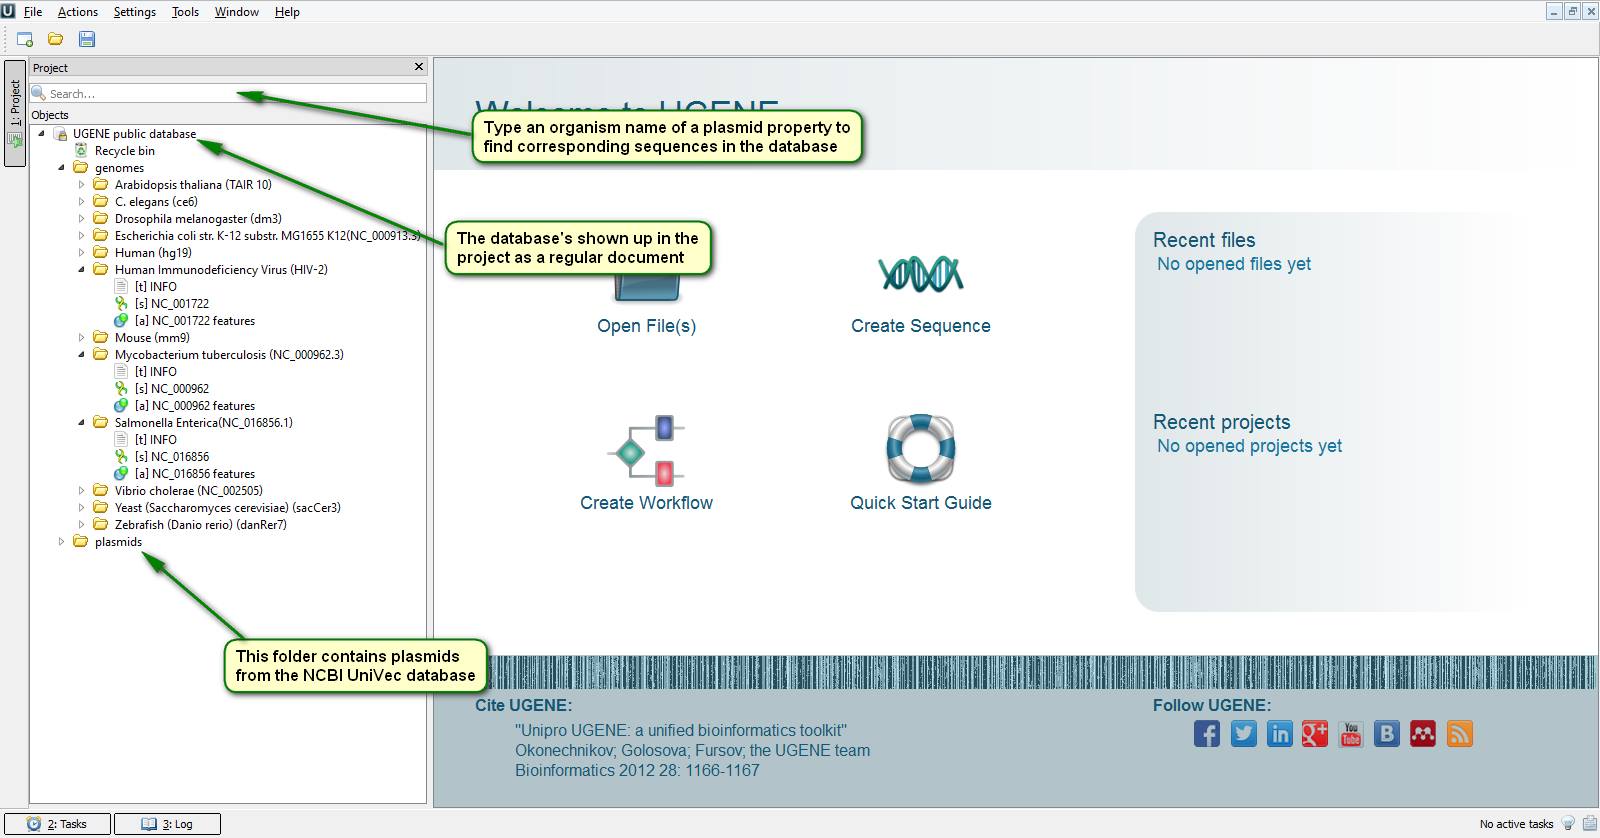
Next time you need mouse, drosophila or arabidopsis chromosome sequences don't be in a hurry to go to the NCBI site since UGENE has embedded access to annotated sequences of often used genomes including human, HIV, zebrafish and a few others. Almost a year ago we created a public database of biological sequences accessible to every UGENE user via the Internet. The interaction with its content is done seamlessly by the conventional UGENE sequence viewer. It looks like you work with files located on your local computer. One of the main advantages of this database is that you don't have to wait for needed files to be downloaded completely over the network. Instead UGENE downloads only a piece of a sequence that is to be displayed on your screen which is pretty fast. However you can still download the files from the database to continue working with them offline.
Besides chromosome sequences our storage also contains the NCBI UniVec vector database.
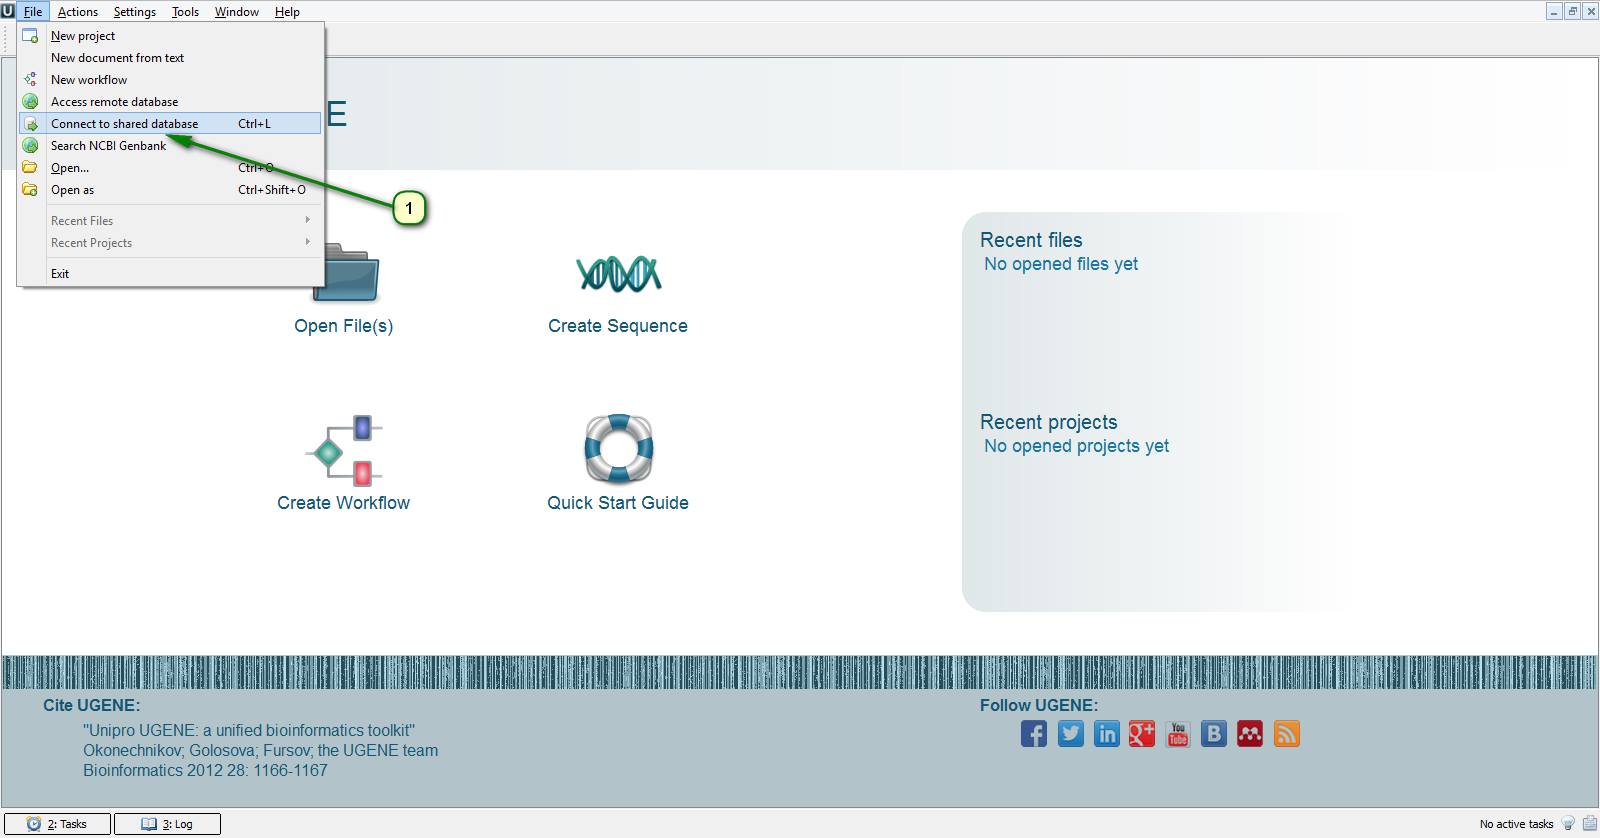
On the attached screenshots you can see how to connect to the public database.
Leave your comments about which other sequences you'd like to see in the nucleotide sequence database and we'll add them.
Your Own Public Database
UGENE tips: 5 steps to the creation of your own bioinformatics nucleotide sequence database.
Last week we told (http://on.fb.me/1EwgIZ1) about the public database embedded into UGENE that contains frequently used sequences of chromosomes and plasmids. And today you're going to know how to create a similar database for your lab or institute. After this any UGENE user having access to it will be able to upload to it files with sequences, multiple alignments, genome assemblies, in short, all the data you analyze in UGENE. Besides, users will be able to work the the information located in the database without downloading it completely on their workstations.
1. So first of all, you have to decide on which computer you'd like to deploy the database and find out its IP-address. Then you have to install the MySQL database server which can be found on the official site: http://bit.ly/1CBCsHU. Pay attention to your OS version when choosing MySQL package for downloading.
2. After this you have to launch database server. This can be done in terminal/command line by instructions different for various operating systems. For example, in Windows this is "C:\Program Files\MySQL\MySQL Server 5.7\bin\mysqld", in Linux – “sudo /etc/init.d/mysql start”, in OS X – “sudo /usr/local/mysql/support-files/mysql.server start”. Note that default paths to MySQL executable files are used in the examples above. In your case they may differ.
3. After this it's only left to create an empty database that will be used by UGENE subsequently. To do this you have to launch the SQL interpreter. Again, this is done differently on various systems. Windows – “C:\Program Files\MySQL\MySQL Server 5.7\bin\mysql -u root -p”, Linux and OS X – “mysql -u root -p”. After you've run this command, a password is asked. Just press "Enter".
4. Finally, to create an empty database you have to execute the following command: "create database `my database`; exit;", where you may use whatever database name you want instead of "my database".
5. Then you have to run UGENE on the same workstation or another one located in the same local network and follow the attached screenshots.
After you've created your own bioinformatics database, you can learn how to work with it in our documentation: http://bit.ly/1xCTEFq. Leave your comments if you have any questions, and we'll help you.